
I'll admit, this week I got a little carried away on the inserts so I thought they deserved their own post. Mostly the inserts this week were because I took a lot of photos. Birthday weeks + a Project Life Party tend to do that. I also took some photos with the big camera and wanted some 4x6 photos added in the album.
So here we go. This is the first insert, simply a Design F page protector with the last column trimmed down. I trim just outside of that last seam so the seam stays intact. Another trick I've done with this is to trim a little further out and then use washi tape along it to help set it apart from the other pages. Here I just kept the trim closer because I have a bigger Design G behind it, and that one works really well to set it apart from the regular spread.
I used a title card from the Midnight Edition of Project Life for the title. Letter stickers are from a Studio Calico kit. You could also just use two Collect cards or two 3x4 cards attached to a white piece of cardstock (or even a piece of transparency) instead of a title if you like. I've tried both of those approaches when I have one side of a Design A that I'm using mainly Collect cards on. Just a thought if you get tired of trying to come up with big title cards.


Here is the back of that insert. Just used a pice of patterned paper trimmed to 4x6 and a gold label from Studio Calico for my title card. I spent one evening in the living room watching TV with my family and trimmed down a bunch of my 6x6 paper pads and other 12x12 papers to create a stash of 4x6 papers specifically for this reason. I really love filler cards and title cards. It just creates a bit of context and gives the eye a place to rest with everything else that can be going on.
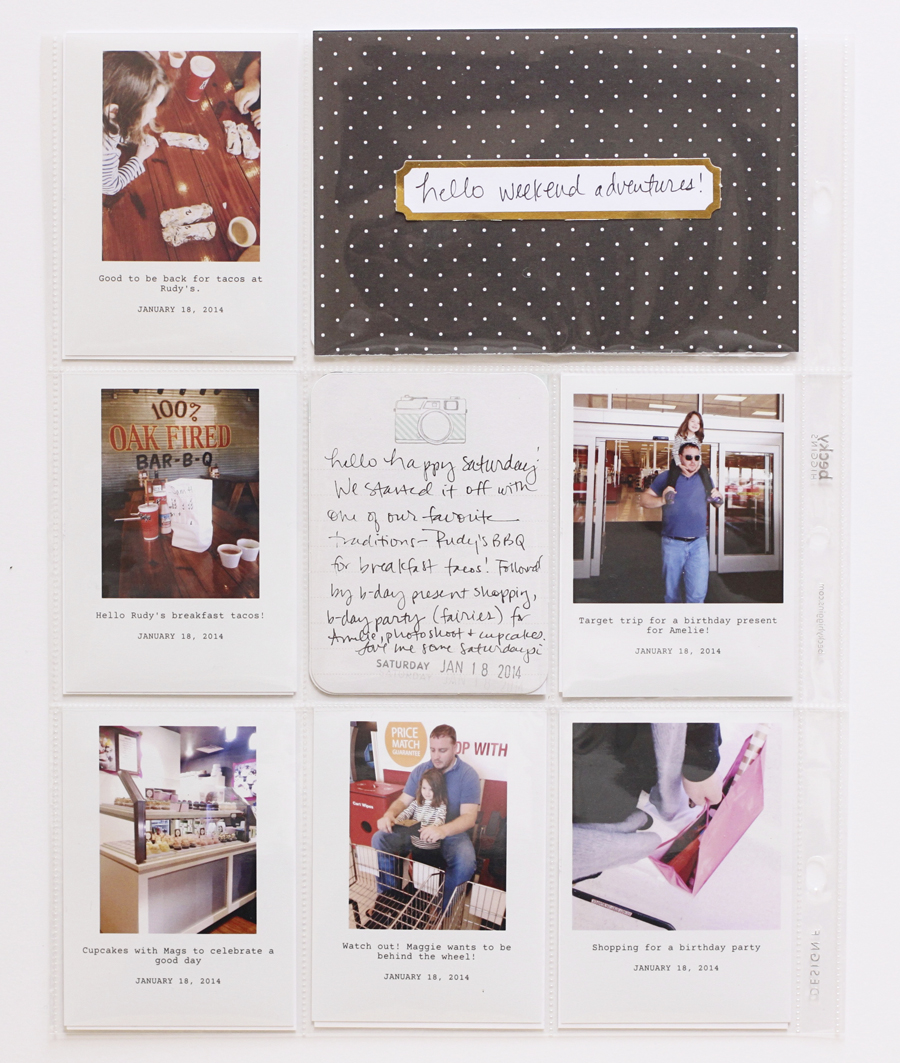
And I love documenting the weekend adventures together. When my work weeks are really busy, I don't have much time to document during the week, so the weekends tend to be really photo heavy.

And of course I had to have a separate insert for our Project Life party! Was so thrilled to meet Molly Frances and get together with my friend Nicole to play at Archiver's before they closed. Still so very sad about that. I'm really happy she helped me organize it. I can be a bit of a hermit, and it was great to get out and be with friends who "get it" (my obsession with this!) Plus, I picked up a really cute hello stamp from Molly! Her stamps are great, by the way! And she introduced me to a great gold ink by ColorBox. I think this is the one here. It's a darker gold so it shows up better than others that I've used. Love learning new tips although my budget was pretty busted after the sales at Archivers :)

Again, I used a title card, this one from the Cut and Paste mini kit I think. Plus letter stickers. These are Thickers from Studio Calico. I think this approach is one I'll be using over and over. It really helps me use up my Thickers collection too.

And I love just a bit of handwriting on a card. Simple and easy. No worrying about typing it up, running it through a printer or even a typewriter. Just a pen and a card. The way the kits were originally designed to be. I adore anything of my parents or grandparents with their handwriting, so I try to be sure to add some of my own in the album.

I seemed to have taken a lot of photos of my stamps and projects this week, so I decided to include them! Documenting real life, including our obsessions! This title card is from the Sunshine kit. My friend in Hong Kong sent me some in exchange for some from the 5th and Frolic edition. That's something to keep in mind--you can always share your kits with friends as they do come with quite a few multiples.

Here is a Design G page protector--it included pockets for 3x4, 6x4 and 4x6. So I can include my vertical portrait type photos from my big camera here. If I only have a few, then adding some filler cards and even the confetti pocket help fill out the pockets. Thinking I might go back and add in more context to this insert with journaling about why she was dressed up, but I did add a photo of her with her face painted on my regular spread with information about being dressed up for a birthday party. Mainly here I just wanted to include these cute photos.
The hello card is from Studio Calico's Printshop collection (one of my faves) and the cute filler card is from a We R Memory Keepers Albums Made Easy card pack that I had picked up at Target.
Here's an example where I used a transparency sheet--I simply cut the cards in half and adhered them to the transparencies I had cut to fit the 3x4 pockets. I like how they are kind of floating and then there are more see-through elements in the album.


So there it is! My Insert Happy week 3. I'm not feeling so bad about not taking as many photos in March now! :)
Again, if you have any questions just let me know!
Project Life® is a simple approach to scrapbooking developed by Becky Higgins. For more information click here.
To join me, along with Elise Blaha Cripe and Megan Anderson, for three weeks of Project Life inspiration in our class Project Life Lessons at Big Picture Classes, click here. Would love to have you join us and would love to help you develop an approach that works for you.

Love the bright and airy pages!
ReplyDeleteReally loving the last couple of spreads, they are full of pastel, whimsical loveliness! :)
ReplyDeleteThe friend in Hong Kong...hey, that's me!!! YAY! So glad you are enjoying them. I have an huge admiration for your confetti pockets! You always seem to have just the right amount for it to fill the pocket and yet have enough room to move around. .
ReplyDelete